
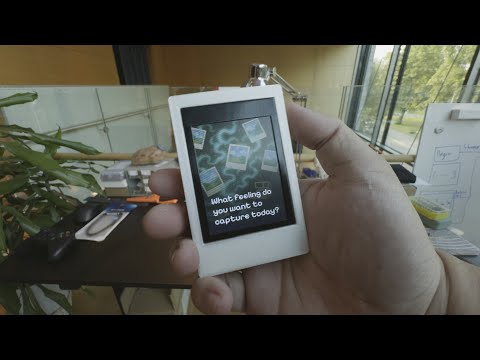
Memento is an interactive polaroid image built on top of the Unihiker K10. With this device, hobbyists can try different interactive paradigms:
- A GenAI Camera: Take a picture, get a GenAI photo.
- A Voice Photo Gallery: Interact with your photo gallery through voice e.g. when was the last time I was happy.
- A Portal: Stream diffused camera stream to show you an alternate world.
- A Locket: Take a picture, share instantly with friends (Mockup Stage).
- A Memory Reminder Device: Reminds you of past memories every day (Mockup Stage).
To understand more about the device, you're welcome to read our experiment article here.
To have an overview of the device functioning, you're welcome to watch our introduction video here.
This repository contains 4 directories:
- Models contains 3D models of the device. You can also reference and export these directly from our OnShape design here.
- Projects contains the Arduino projects for each of the aforementioned functions of the device. Inside each project, you can also find the server directory which contains the backend for corresponding application.
- Storage contains the artifacts used by the device for UI/UX. You'll need to put the content of this directory on an SD card and plug it into the device for it to work properly.
- Images contains additional documentation and reference images.

This project is sponsored by DFRobot. To build this project, you'll need:
- A Unihiker K10 (You can buy it here)
- Access to 3D printer of choice
- An SD card (minimum 512MB recommended)
- A computer with Arduino IDE installed
Unihiker K10 is an AI learning device designed for education. It integrates a 2.8-inch color screen, Wi-Fi and Bluetooth, a camera, microphone, speaker, RGB light, temperature sensor, humidity sensor, light sensor, and accelerometer. It also features edge connectors and Gravity IO interfaces, enabling the connection and control of various digital, analog, I2C, and UART sensors and actuators.
We're proud to be one of the first hobbyists to develop use cases for the device.
Each project contains 2 software components:
- Arduino Firmware: Controls the hardware and user interface
- FastAPI Backend: Handles AI processing and external API calls (for projects that need it)
Furthermore, for certain projects, you'll need extra dependencies:
- Polaroid: You'll need an API Key to Google Gemini API and ImageRouter.
- Film: You'll need an API Key to Google Gemini API.
- Memory-cue, Locket, Streamdiffusion: No external API keys required.
These project-specific notes will be mentioned later in the instructions.
To set up the development environment for the Unihiker K10, it is recommended to go through this official document first and set up one of their examples code.
Note: At the point of writing, Unihiker documentation may contain some bugs which might force you to edit the board package platform. If you encounter this problem, please submit an issue request and we'll provide specific instructions if the Unihiker team hasn't resolved this problem yet.
- Open Arduino IDE
- Go to File → Open
- Navigate to the project folder you want to install (e.g.,
projects/polaroid/) - Select the main
.inofile (e.g.,polaroid.ino) - Arduino IDE will automatically open all the helper files in the same folder

- Make sure your Unihiker K10 is connected to your computer via USB
- In Arduino IDE, select the correct board:
- Go to Tools → Board → Unihiker K10
- Select the correct port:
- Go to Tools → Port → Select the port where your Unihiker K10 appears
- Click the Upload button (→ arrow icon) or press Ctrl+U (Windows/Linux) or Cmd+U (Mac)
- Wait for the compilation and upload to complete
- The device will automatically restart and run your code

If a project requires WiFi connection, a file called wifi_helper.ino will be available.
To configure WiFi:
- Open the
wifi_helper.inofile in your project - Find these lines:
const char *WIFI_SSID = "PUT YOUR WIFI SSID HERE";
const char *WIFI_PASSWORD = "PUT YOUR WIFI PASSWORD HERE";
- Replace
"PUT YOUR WIFI SSID HERE"with your WiFi network name - Replace
"PUT YOUR WIFI PASSWORD HERE"with your WiFi password - Save the file and upload the project again
Example:
const char *WIFI_SSID = "MyHomeWiFi";
const char *WIFI_PASSWORD = "mypassword123";
If a project requires backend connection, a file called gen_ai_helper.ino will be available.
To configure the server IP:
- Open the
gen_ai_helper.inofile in your project - Find this line:
const char *SERVER_URL = "http://10.8.35.228:8000/upload_adv";
- Replace the IP address with your computer's IP address where the server will run
- Save the file and upload the project again
To find your computer's IP address:
- Windows: Open Command Prompt and type
ipconfig - Mac/Linux: Open Terminal and type
ifconfigorip addr
Look for your local network IP (usually starts with 192.168. or 10.)

If a project requires a backend server to work, you can find a server directory in such project.
To run this server, you'll need to install uv package manager for Python environment. Further instructions can be found here.
Quick installation:
- Windows:
powershell -c "irm https://astral.sh/uv/install.ps1 | iex" - macOS/Linux:
curl -LsSf https://astral.sh/uv/install.sh | sh
- Open a terminal/command prompt
- Navigate to the server directory of your project:
cd projects/polaroid/server - Run the server:
uv run main.py
- The server will start and display the IP address and port (usually
http://0.0.0.0:8000)
As mentioned before, you need to set up some services for the backend to work. For each service, you'll need an API key. You'll need to write a .env file with the API keys of each service.
- In the server directory, copy the example environment file:
cp .example.env .env
- Open the
.envfile in a text editor - Replace the placeholder values with your actual API keys:
For Polaroid project:
GEMINI_API_KEY=your_actual_gemini_api_key_here
IMAGEROUTER_API_KEY=your_actual_imagerouter_api_key_here
For Film project:
GEMINI_API_KEY=your_actual_gemini_api_key_here
-
Google Gemini API:
- Go to Google AI Studio
- Sign in with your Google account
- Click "Get API key" or go to the API keys section
- Create a new API key
- Copy the key and paste it in your
.envfile
-
ImageRouter API:
- Go to ImageRouter
- Sign up for an account
- Navigate to your API keys section
- Generate a new API key
- Copy the key and paste it in your
.envfile
After setting up the API keys and running the server, you can test if it's working by opening your web browser and going to:
http://localhost:8000/docs
This will show you the FastAPI documentation interface where you can test the endpoints.
The device requires certain files to be stored on an SD card for proper operation.
- Format your SD card as FAT32
- Copy the entire contents of the
storage/directory to the root of your SD card - Make sure the folder structure is preserved
Important: The SD card must be inserted into the Unihiker K10 before powering it on.
Each project uses different files from the storage directory:
- Polaroid: Uses files from
storage/polaroid/andstorage/shutter.wav,storage/loading.wav - Film: Uses files from
storage/film/andstorage/shutter.wav,storage/loading.wav - Memory-cue: Uses files from
storage/memory-cue/ - Locket: Uses files from
storage/locket/ - Streamdiffusion: No additional files required

The device's enclosure is divided into 3 parts:
- Body: Main housing for the Unihiker K10
- Back Plate: Covers the back of the device
- Button: Interactive button component
The design philosophy is that you'll have a device where you can easily customize. In this case, it's the back plate. There were multiple back plates that were designed in our experiment. However, there are only 2 options now: one without screws and one with screws.
The one without screws simply fits by friction and therefore the fit can vary with different 3D printers.
- Print the 3D models: Print the Body, Back Plate (choose with or without screws), and Button
- Insert the button: Put the buttons into the holes on the side first
- Insert the device: Place the Unihiker K10 into the body, orienting it so that the Type-C charger port aligns with its hole
- Attach the back plate: Place the back plate on the back of the device
- Insert the SD card: Make sure the SD card is properly inserted
- Power on: Connect the device to power or insert batteries
- Material: PLA or PETG recommended
- Infill: 15% infill for everything.
- Support: Enable supports for overhangs
- Layer height: 0.2mm for good quality
- Print orientation: Print the body with the large flat side down

- Features: Takes photos and applies AI-generated effects
- Requirements: WiFi connection, server running, Gemini API key, ImageRouter API key
- Usage: Shake the device to take a photo, wait for AI processing

- Features: Creates vintage film-style photos with AI enhancement
- Requirements: WiFi connection, server running, Gemini API key
- Usage: Shake the device to take a photo, wait for processing

- Features: Takes photos and displays them (mockup stage)
- Requirements: No WiFi or server needed
- Usage: Shake to take a photo, view stored photos
- Features: Displays pre-loaded memories at scheduled times
- Requirements: No WiFi or server needed
- Usage: Device automatically shows memories, shake to cycle through them
- Features: Real-time AI image processing stream
- Requirements: Set up the realtime-img2img demo from the Stream Diffusion project before using this feature.
- Usage: Point camera at objects to see AI-processed versions
Device won't turn on:
- Check if SD card is properly inserted
- Ensure power connection is secure
- Try a different USB cable
WiFi connection fails:
- Double-check SSID and password in
wifi_helper.ino - Ensure your WiFi network is 2.4GHz (5GHz may not work)
- Check if the device is within range of your router
Server connection fails:
- Verify the IP address in
gen_ai_helper.inomatches your computer's IP - Ensure the server is running (
uv run main.py) - Check if your firewall is blocking the connection
- Make sure both device and computer are on the same network
Photos not saving:
- Check if SD card has enough free space
- Ensure SD card is formatted as FAT32
- Verify all required files are copied to SD card
3D printed parts don't fit:
- Check your printer's calibration
- Try the back plate with screws if friction fit is too loose
- Adjust print settings for better dimensional accuracy
If you encounter issues not covered here:
- Check the Unihiker K10 documentation
- Submit an issue on this repository
- Check the Arduino IDE serial monitor for error messages
This project is licensed under the GNU General Public License v3.0. See the LICENSE file for details.
This means you are free to:
- Use this software for any purpose
- Modify the software
- Distribute the software
- Distribute modified versions
However, if you distribute this software or modified versions, you must also distribute the source code under the same license terms.